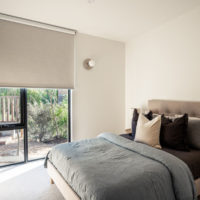
The easy way to install and setup your Whispertech™ motorised blinds
Welcome to our simple guide to setting up your Whispertech™ motorised blinds. You'll love how quick and easy it is to set up your new motorised blinds.
Before you get going
Your custom kit:
 A
A
 B
B
 C
C
 D
D
 E
E
 F
F
 G
G
OK, it's time to start installing,
let's take it step by step
Installing your blind is easy and fun. Follow these steps, then kick back and admire a job well done.
Here's how to do it:
1 Get organised
-
A
Unpack your custom kit, and lay out your roller blind on a clean floor, under your window.
-
B
You'll need to fully charge the motor before you start.
Use the USB-C cable to charge the motor before you start the installation.
❗When you are holding the roller blind, do not hold it with the motor at the bottom; the motor may slide out.
2 Mark up
-
A
Take your pencil and both brackets. Lift each bracket up into position and mark two level dots where the screws will attach the bracket to the frame.
-
B
This will be in the top corners of your frame.
3 Attach your brackets
-
A
Using your cordless drill with the 3 mm drill bit, pre-drill 2 holes where you marked the two pencil dots.
-
B
Pick up the control drive bracket and position it on the side of the frame where your motor will sit. The holes in the bracket should be directly over the two holes you just drilled. Secure the bracket with the screws in your custom kit, using your cordless drill with the Phillips head drill bit.
Repeat the process for the pin end bracket.
4 Click in your blind
-
A
Pick up your roller blind and make sure the motor is on the same side as the control bracket. Check that the charging port and program button are easily accessible.
-
B
Gently slot the motor end into the control bracket.
-
C
Then slot the pin end into the pin end bracket, until you hear a click.
Not a perfect fit? Don’t worry. Your blind should click into the brackets easily. If you encounter any issues, go to the 'I need some extra help' section at the bottom.
-
D
To finish off, slide your two bracket covers onto the outside of each bracket.
How to pair your remote with
Whispertech™ motorised roller blinds
5 Charge your motor battery
Insert the USB-C charging cable located on the side of your Whispertech™ blind motor. Remember your motor battery needs to be charged before you start.

6 Wake up your blind motor
Press the program button located on the side of your roller blind motor for 2 seconds to active your motor.
The blind should jog up and down once,and the LED light will flash.

7 Select your channel
The Whispertech™ remote comes with 6 channels.
Select the desired channel on the remote by toggling between the CH- or CH+ buttons.
The channel is indicated by the blue LED light on the top of the remote.

8 Assign your blind to the channel
-
A
Hold down the program button located on the side of your roller blind motor for 2 seconds until the blind jogs once.
-
B
Within 10 seconds, hold the P2 button on the back of your remote for 2 seconds until the motor jogs twice.
Blinds won't jog? See 'I need some extra help' at bottom of the page.
9 Check your roll direction
-
A
Press either the up or down button on your remote and check that your blind rolls in the right direction.
The up button should roll your blind up and the down button should roll your blind down. If this is not correct, proceed to section B. If it is correct, go to section 10.
-
B
If your roll direction is wrong, hold the square button and the heart button at the same time for 2 seconds until the motor jogs once.
Check again and your blind should roll in the right direction now.
10 Set your blinds upper limit
-
A
Press and hold the up button until the blind rolls up continuously.
Then, press the square/stop button to stop it at your desired upper limit. -
B
Hold the up and heart buttons simultaneously for 2 seconds until the blind jogs up and down twice to lock the upper limit.
11 Set your blinds lower limit
-
A
Press and hold the down button until the blind rolls down continuously.
Then, press the square/stop button to stop it at your desired lower limit. -
B
Hold the down and heart buttons simultaneously for 2 seconds until the blind jogs up and down twice to lock the lower limit.
12 You're all set to start using your Whispertech™ remote!
Use the up and down buttons to control your blind and the square button to stop your blind moving.


Congrats, you did it! Before you kick back and admire a job well done, don’t forget to snap some photos and share your look with us. And tag us on Instagram to really make our day.
I need some extra help
Have a question? We’re here to help
1300 918 390
Mon to Fri 9am - 5pm


